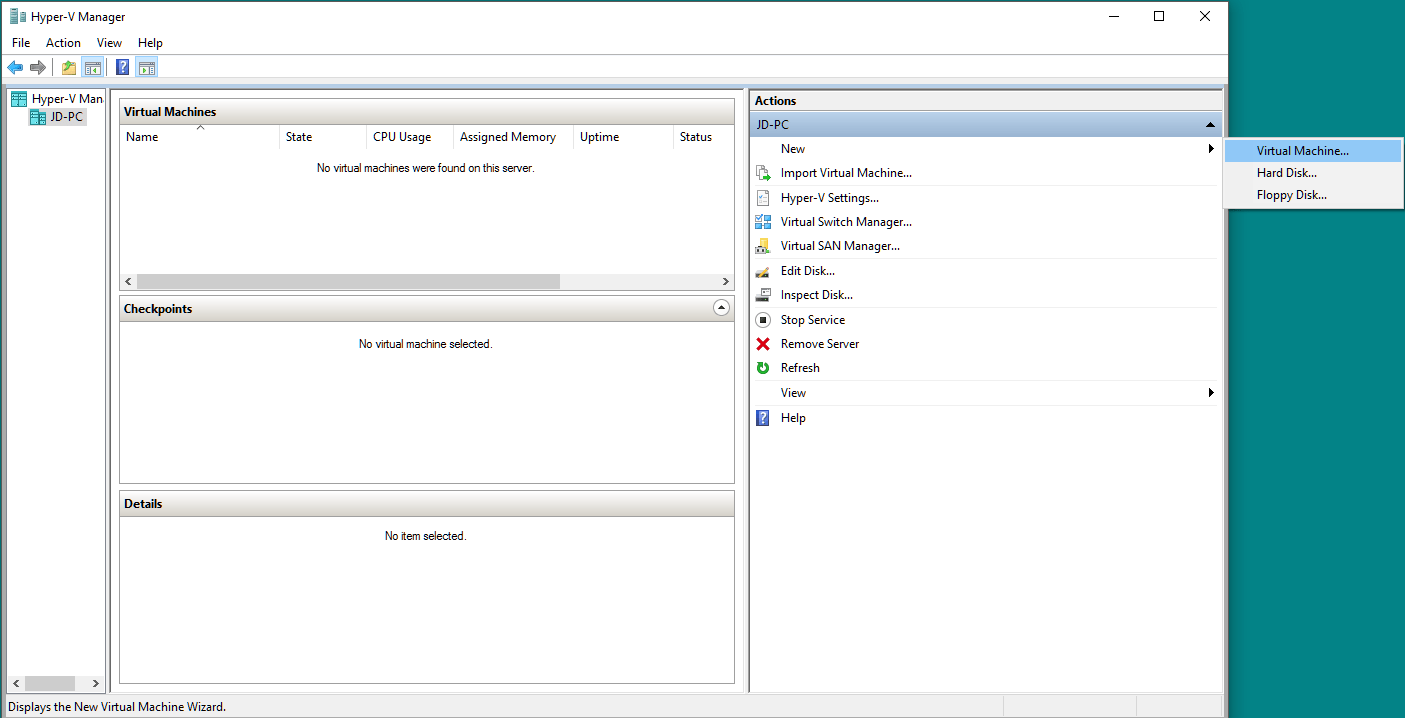
- Open Hyper-V Manager, and under the Actions tab, click “New” and then “Virtual Machine”.

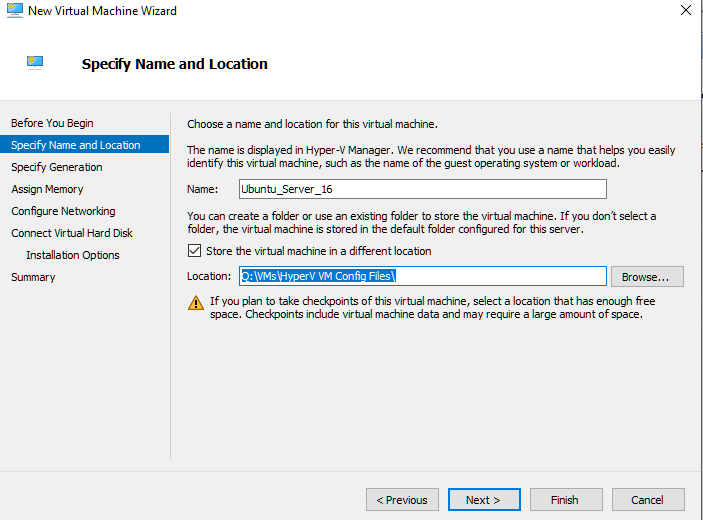
- Choose a name for your VM. I prefer naming schemes that accurately reflect what OS the VM will be running, and/or it’s intended purpose. Next, choose a location to store the VM if you so choose, and then click “Next >”.
 Note: Snapshots, configuration information, and other data will be stored in this location. If you only have one drive installed on your computer, you’ll probably install it somewhere on the C: drive. If you have multiple drives, you may want to consider storing the VM and other files on a drive other than your main OS drive, especially if your OS drive is significantly smaller than your other drives (as is my case).
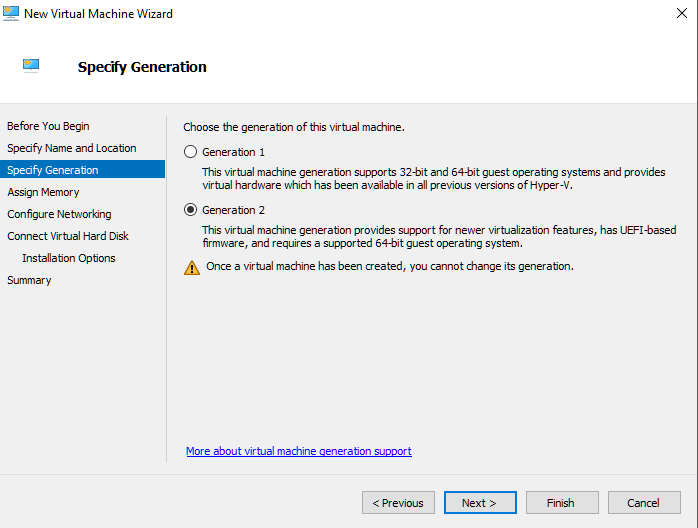
 - Choose if you’d like to create a Generation 1 or a Generation 2 VM. Microsoft’s TechNet has a good breakdown between the two, as do many other resources. Generation 1 VMs tend to be compatible with older OSs, can be migrated to older versions of Hyper-V, and support 32-bit VMs. Generation 2 VMs tend to perform better, offer more features, and seem to work better with newer OSs, including a number of Linux distros. I plan on only using newer host OSs (Windows 8.1+, Server 2012 r2+) and want the features offered by Generation 2 VMs, so I’ve chosen to create a Gen2 VM.

- Assign some memory to the VM.
The amount you assign will vary, usually based on how much RAM your host has and how much your VM will need. Between 1 and 4GB is usually a good starting point. As a general guideline, I don’t dedicate more than 75% of my host’s RAM to VMs (total), which for me leaves 4GB of memory to my PC or MacBook. If you have less available memory or don’t need as much of a buffer, feel free to dedicate more memory to your VMs. You may also choose to use Dynamic Memory for your VM, which will allow the VM and your host to share memory as another resource, giving your VMs the ability to use more than just the above assigned memory. If you’re using a non-Windows OS, dynamic memory may not work, so assign about as much as you think you’ll need. Once you have decided as much memory you want to give the VM at startup, click “Next >”.
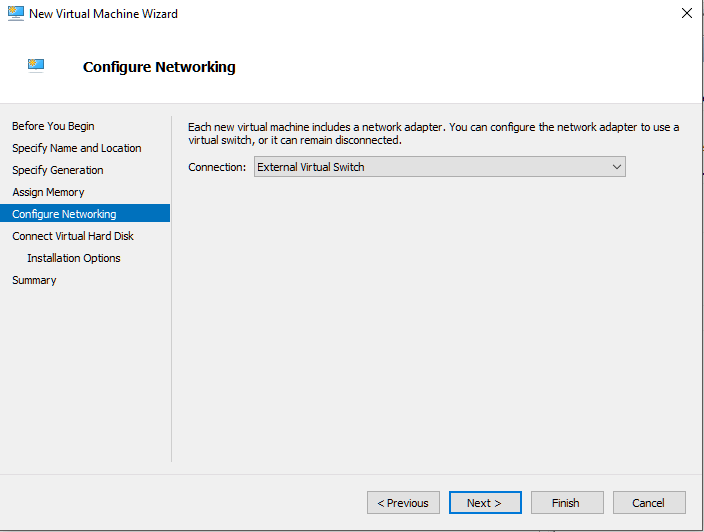
 - If you’d like, choose the virtual switch to which you’d like your VM. I chose the external virtual switch I created earlier. Some use cases may require that you leave the VM disconnected, or connected to a more restrictive virtual switch. Make your choice, and click “Next >”.

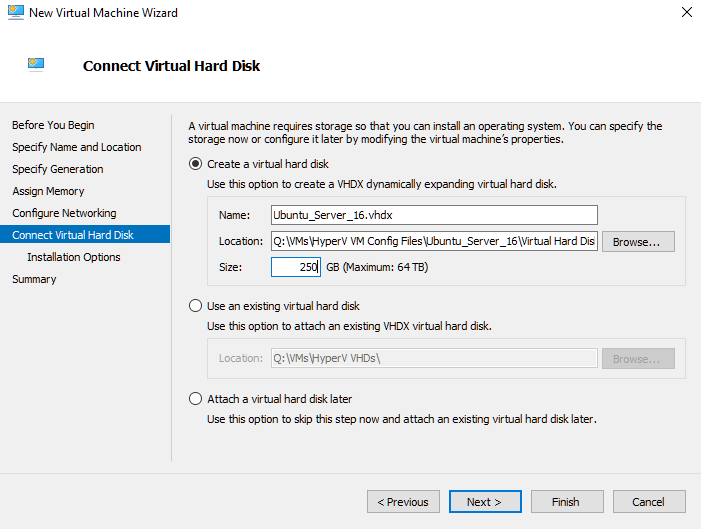
- Create a virtual hard disk that your VM will use as it’s hard drive. Just as with the VM’s other related data, choose an appropriate name and place to store the .VHD/.VHDX file. As far as size goes, dedicate enough space for your OS and the VM’s needs. 40-50GB will give an OK buffer for Windows OSs, and non-Windows OSs tend to have lower minimum requirements. The VM I created while taking these screenshots was intended as a test for hosting a PLEX server, which will temporarily keep some large video files, which is why it’s much larger than would otherwise be needed. Assign the initial hard drive space, and click “Next >”.
 Note: You can later shrink or expand your .VHD and VHDX files, but make sure you at least have enough for the core OS and initial software installation and updates required.
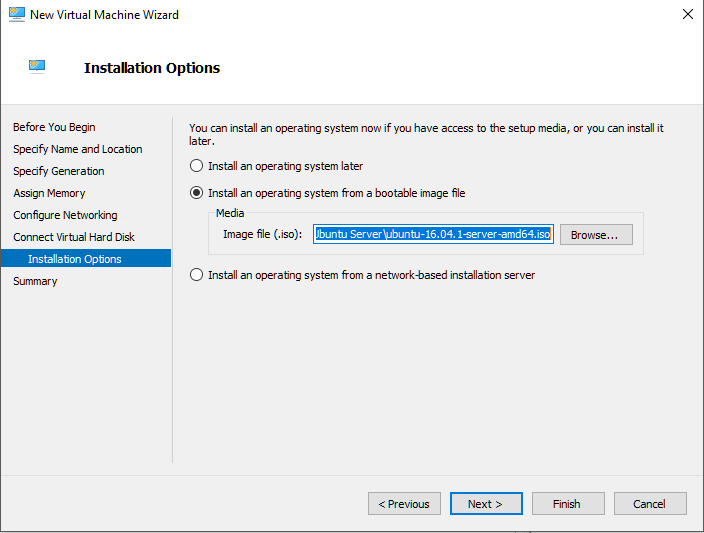
 - If you have it available, choose the .iso file you want your VM to boot to when you first start it up. Typically, you’ll want this to be the installation disk for your OS. If you have a network-based installation server such as MDT or Deploy Studio available, this guide probably isn’t for you. Nonetheless, PXE booting is an option, especially with generation 2 Hyper-V VMs.
 Note: If you don’t have the .ISO available, you can wait to continue setting up the VM while you download it, or you can configure the VM later to add the boot media.
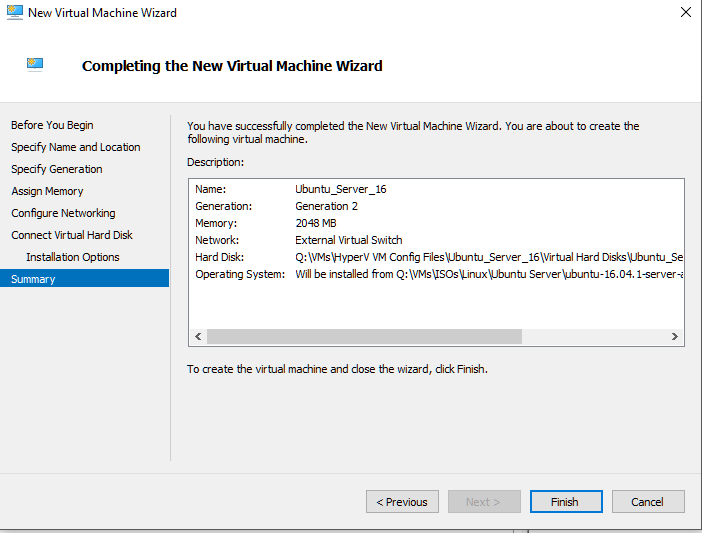
 - Review the settings and description of the VM you’re about to create, and click “Finish”.

- Your VM will now sho up under the Virtual Machine section of Hyper-V Manager. From here, you can start the VM, install its OS, and begin using it!


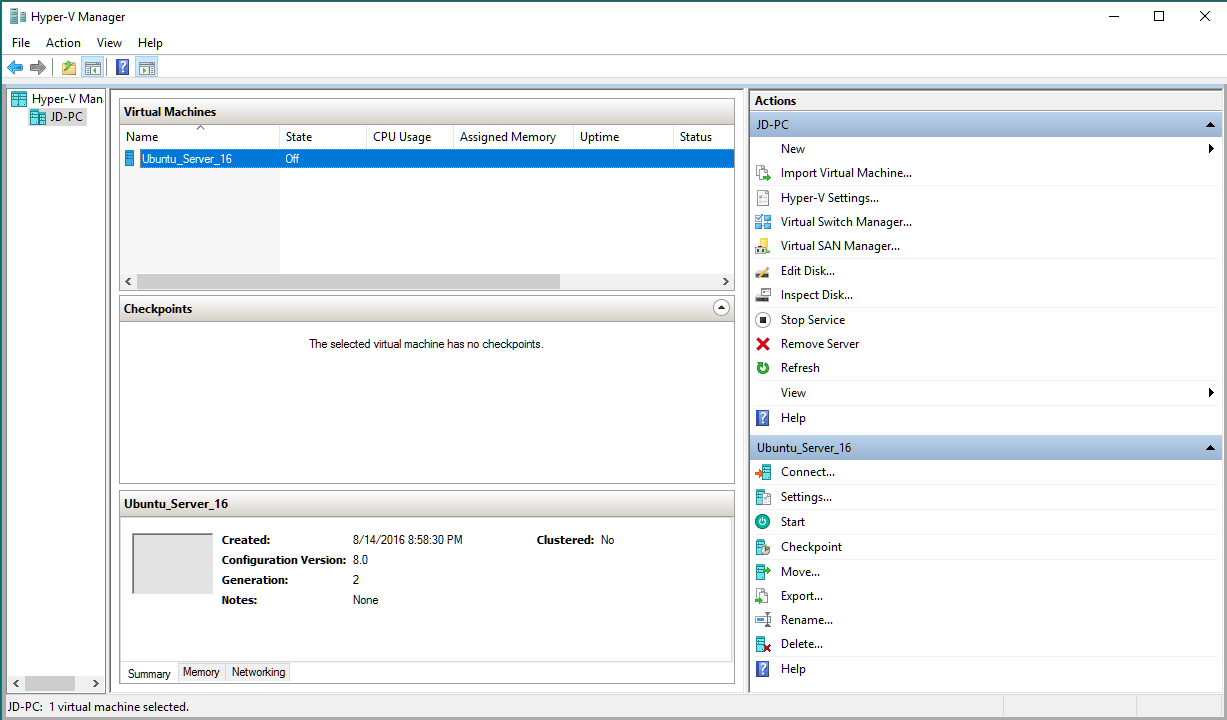
After creating a few VMs in Hyper-V, the process goes by pretty quickly. Be sure to keep track of how much storage space and memory is assigned to each of VMs you create and run simultaneously, otherwise it can get out of hand.